
LED Strip Light Installation Guide
1. Get a clear vision
Make sure you have a clear vision of your project and know how you want the end result to look like. Plan where you want to install your driver and dimmer. It is recommended that your LED strip light is installed on a clean, flat surface using the 3M adhesive tape or mounting clips. Aluminum is preferred, as it will help dissipate the heat from the LEDs, ensuring a longer lifespan.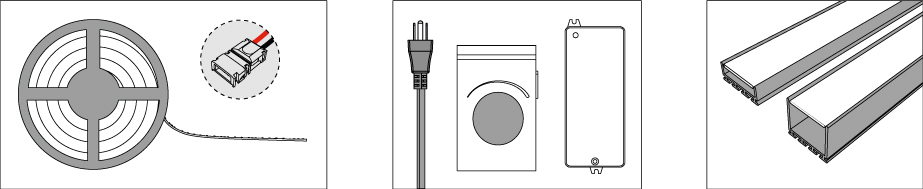
2. Component Check
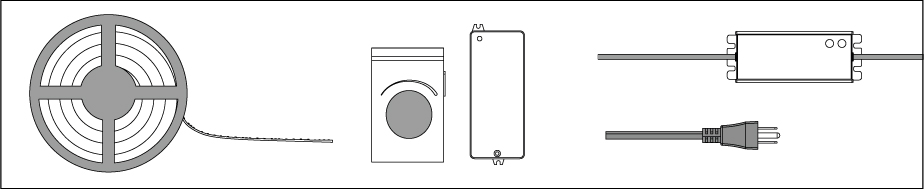
On a freshly cleaned surface, gently unroll the LED strip lights from the plastic reel and lay out all components:- Make sure you have everything you need to complete the installation.
- Make sure your power supply is the right voltage to match your LED strips and it can handle the entire load of the LED runs.
- For longer runs of LED strips, pay attention to the strip’s maximum run length. If you need a run of lights longer than the stated maximum, you may need to install them in parallel from the power source.
3. Mock installation
Before peeling the tape or cutting the strip, make sure to complete a mock installation to test and turn on your lights. Connect your LEDs to your dimmer and power supply. Note: In this example, we are using a wireless dimmer and receiver.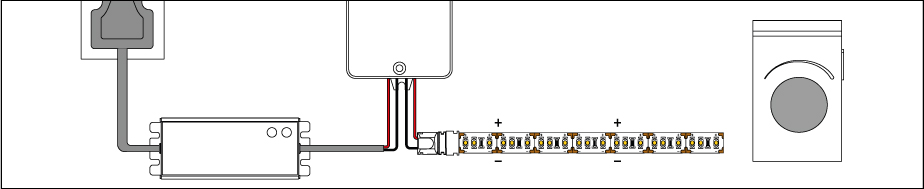
4. Troubleshoot if needed
The strips should light up. If they do not, please check your connections and make sure the polarity is matched from the power supply to the LED strip (positive to positive, negative to negative). There are markings on the strip to indicate polarity.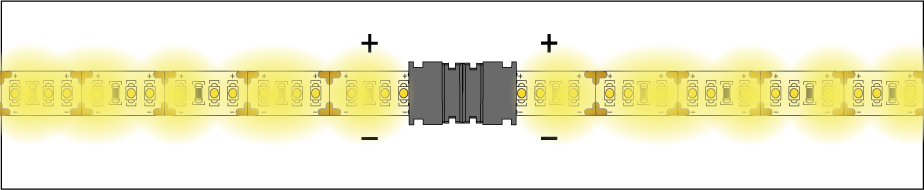
5. Reassess the results against your vision
Hold the strips in place in a sample area that can best demonstrate your application. Verify that the chosen brightness and color temperature is perfect for your project. Remember, if they are not perfect, you can still return/exchange them at this point. After you have cut the strip light or installed it in place, we cannot accept the return as new.Ask yourself once again:
- Are these bright enough? Will I need a dimmer?
- Is the color perfect for my application?
- Are all the LEDs lighting up and functioning properly?
- Do I have enough tape light?

6. Disconnect from power again
Turn off the LEDs and power supply and disconnect them from the power source.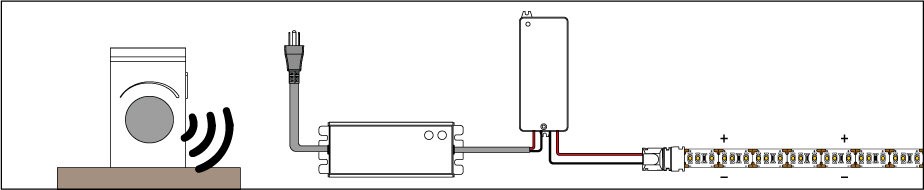
7. Cut the strip light to length if needed
If you need to cut your LED strip light, first measure the length needed and only cut along the indicated cut marks with sharp scissors.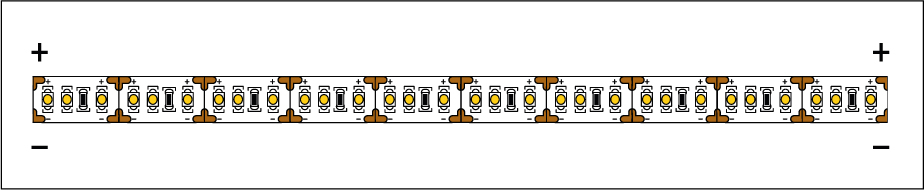
8. Special cases when using connectors
When installing connectors with the UltraBright Architectural Dynamic Tunable Strip Light (UB-AS-DYN), the UltraBright Accent Dynamic Tunable White (UB-AT1-DYN), or the Sienna Dim-to-Warm (UB-SNA-DW) you will need some more copper pad to work with. You need to cut both solder pads so that the piece to be attached to the connector has more surface area to insert into the connector head.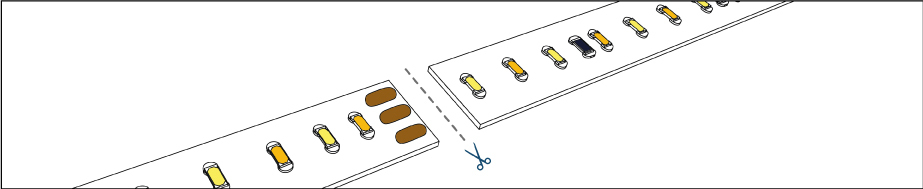
9. Make sure polarity is matched throughout the setup
When installing separate segments of the LED strip together by soldering or using connectors, always make sure the polarity is matched from one strip to the next.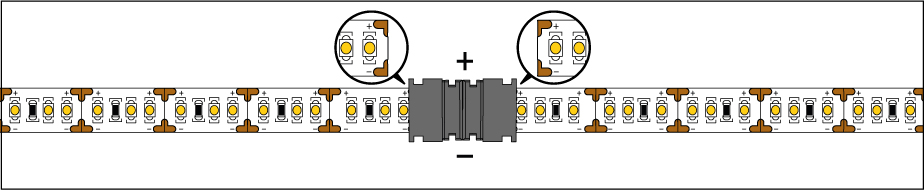
10. Retest the setup
Test the strips again to make sure they all light up and are functioning properly before the final installation. Once you have verified all segments are working, you’re ready to install them.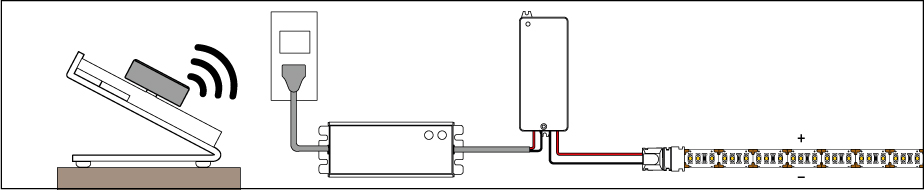
11. Strip light pre-install preparation
Thoroughly clean any surface where you will be attaching your LED strip lights. The adhesive backing is strong, but will not stick to surfaces if they are dirty or dusty.
12. Attach the strip light in place
Peel the cover of the 3M tape a few inches at a time while gently pressing the strip to the installation surface. Make sure the strip is secured on the surface.
13. Complete all connections
Complete the connections and wiring between your power supply, dimmers, controllers, or connectors.
14. Enjoy your lights!
Power on the lights. Congratulations! You have light!Because of our commitment to you, we stand by our products. We are always available to answer any questions or troubleshoot any unlikely issues.
